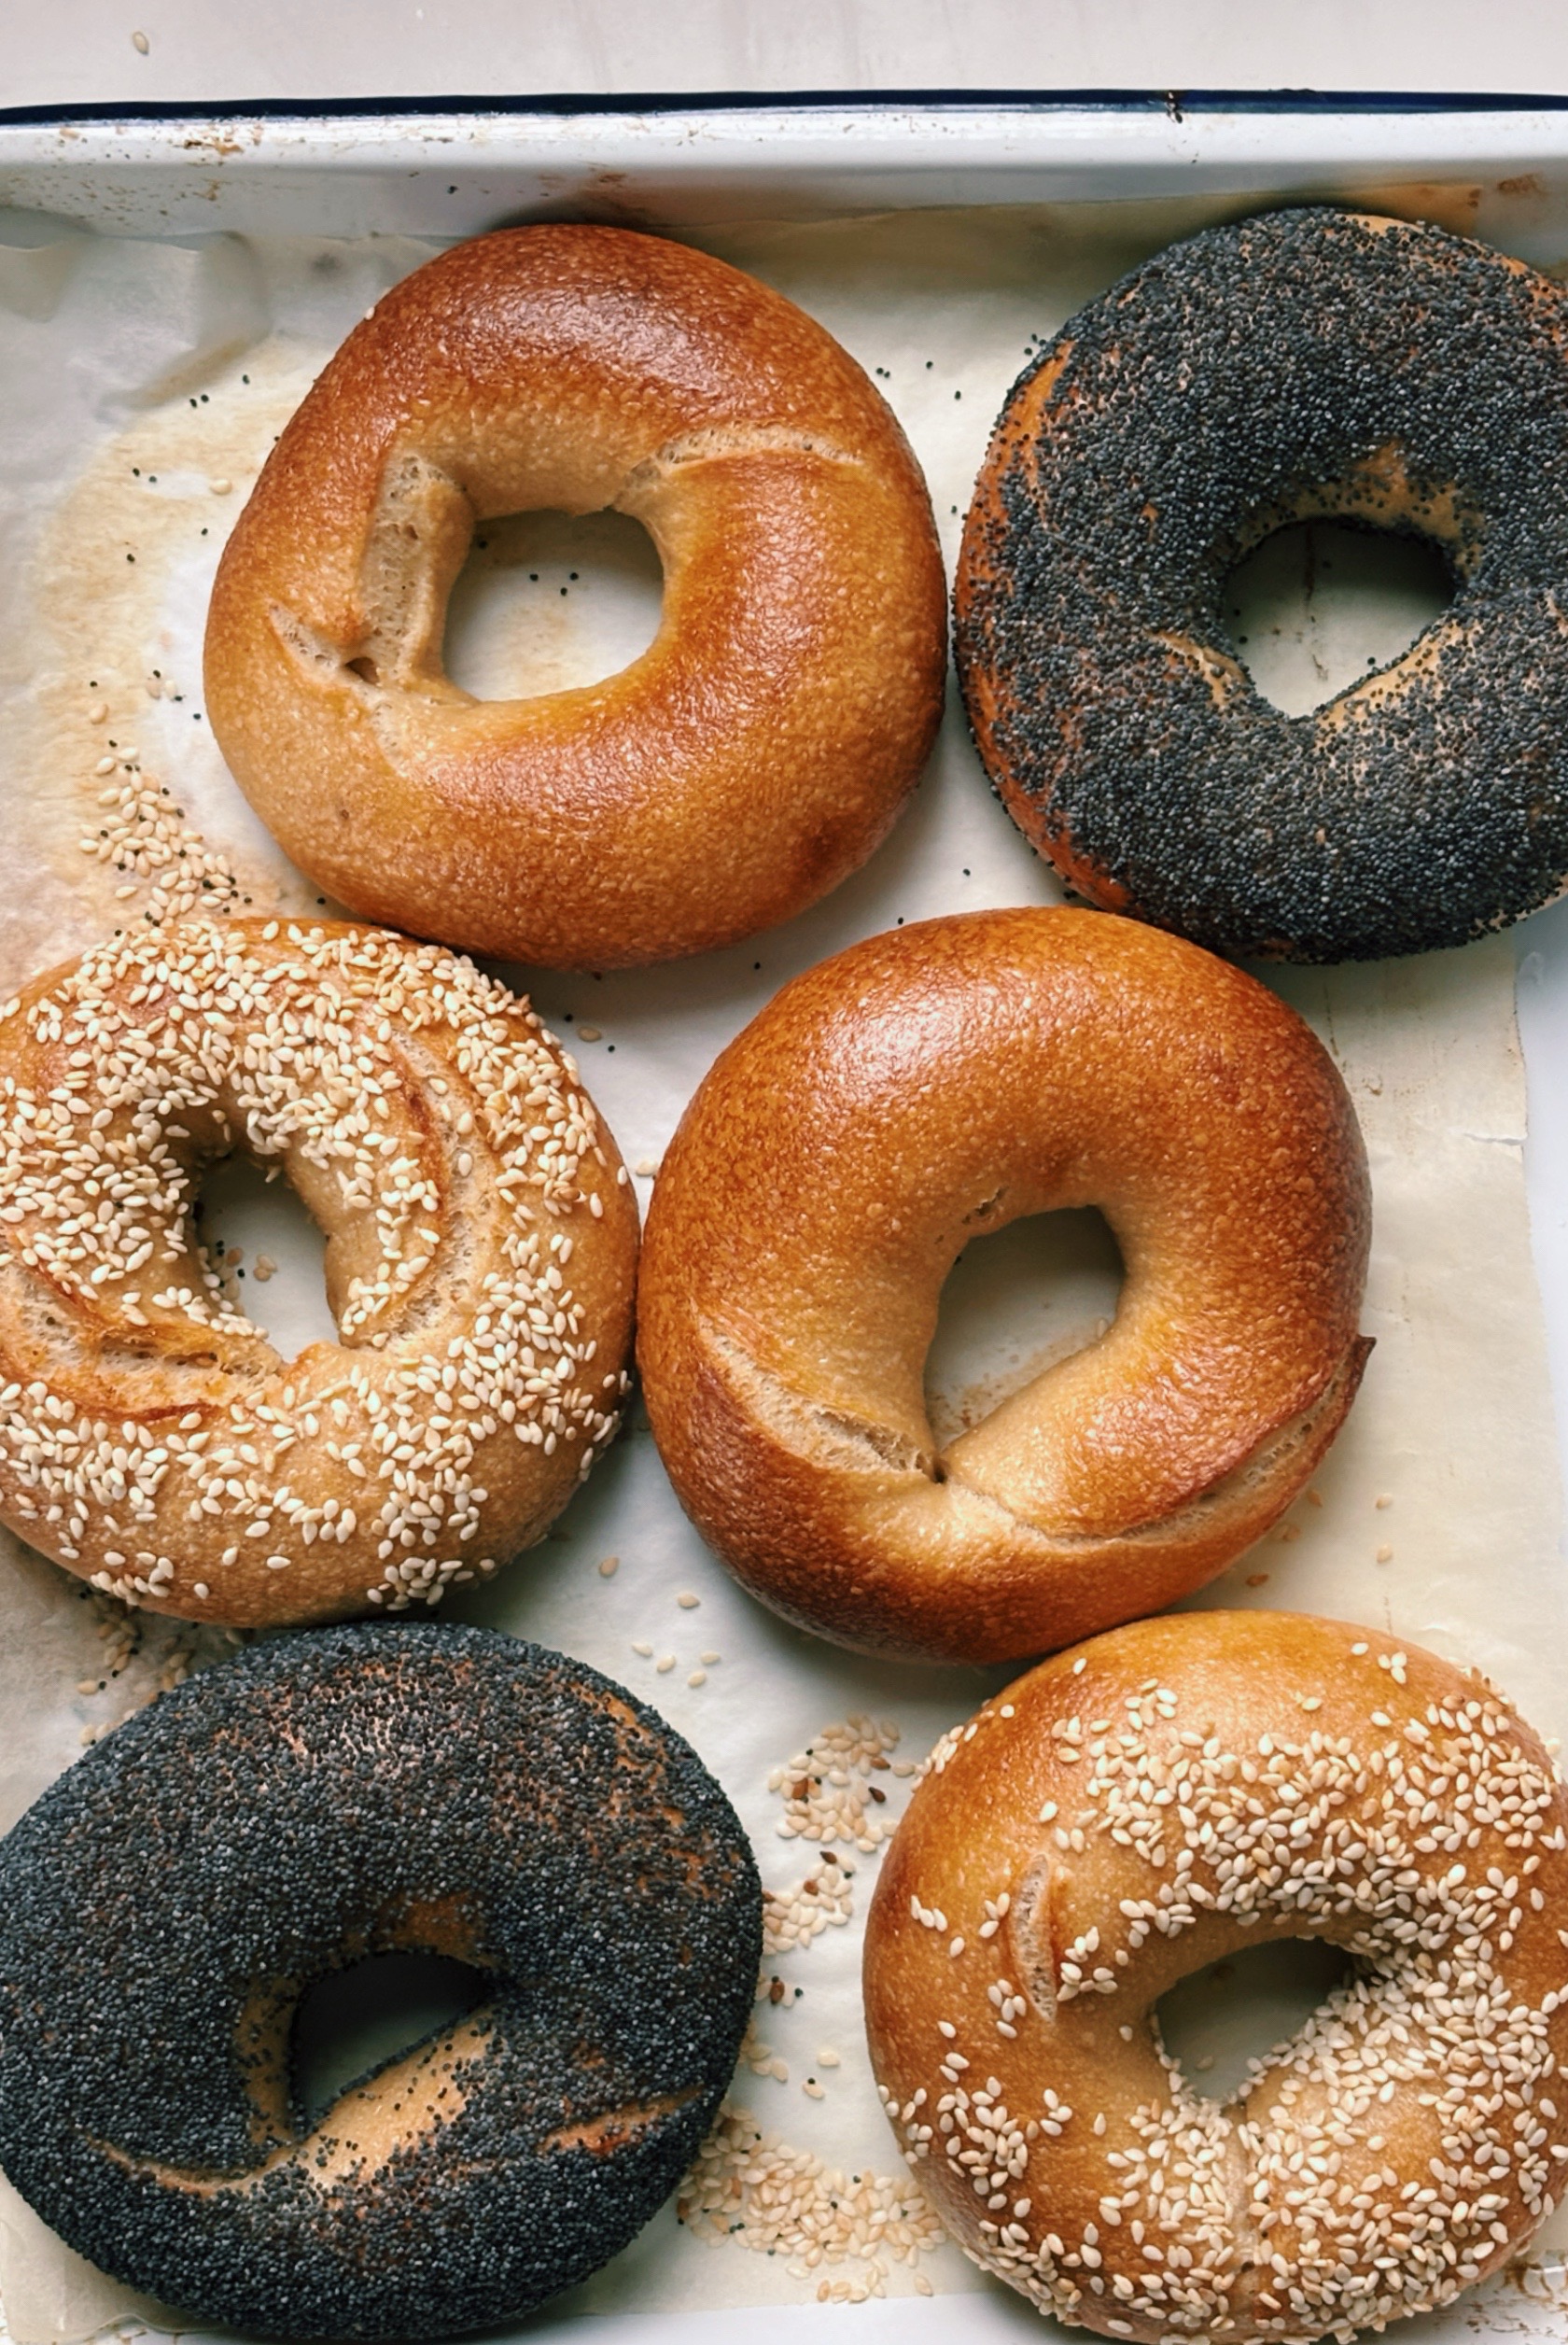
These homemade bagels blend the best of Montreal and New York styles for a delicious, easy-to-make hybrid. They take on Montreal’s gentle honey sweetness, smaller profile, and chewy bite, while the New York influence gives them a soft, balanced crumb and that signature shiny crust from boiling. The dough is cold-fermented overnight and includes sourdough for deeper flavour, while a small amount of yeast ensures a reliable rise.
Crisp on the outside, soft and chewy inside, and wonderfully aromatic, these bagels deliver bakery-quality results!


Most of the ingredients are everyday baking staples – flour, water, yeast, salt, and honey – so these bagels are easy to make without any specialty items. I use freshly milled whole wheat flour for extra flavour and nutrition, but you can swap in another wholegrain flour or plain bread flour and still get amazing results. The levain can also be replaced with 42 g extra flour and 42 g water. Whether you’re using whole grains or not, these bagels turn out soft, chewy, and bakery-quality every time.


Montreal-New York Bagel
Ingredients
Method
- Combine all the ingredients in the bowl of a stand mixer and mix until it comes together into a stiff dough. Rest for 5 minutes.
- After resting, knead the dough for 5 minutes on speed 1, then 5 minutes on speed 2. You're looking for the dough to be smooth and to have developed some elasticity. If it feels slightly underdeveloped, add another 2-3 minutes on speed 2. You can also do this step by hand! Kneading for 10 minutes will do the trick.
- Let the dough rest in the bowl, covered with a damp tea towel or plastic wrap, for 1-1.5 hours until almost doubled in size.
- After the dough has rested and risen, divide it into 6 equal pieces of 115g.
- Shape the dough by rolling it into a rope of roughly 6 inches / 15cm, then overlap the two ends and roll them together. Alternatively, you can form the dough piece into a tight ball (like you would for a bread roll) then poke a confident hole through the middle, widening it slightly.
- Place the bagels on a greased tray and cover with plastic wrap, then place in the fridge overnight to for a cold-ferment.
- The next day, take the bagels of the fridge. You're going to check if the bagels are ready to bake (RTB) by filling a bowl of cold water and placing a bagel in the water. If the unbaked bagel floats, it's RTB! If it sinks, let the bagels sit at room temperature for 30 mins to proof a little longer.
- Preheat the oven to 250℃/500℉, and line a tray with baking paper. Fill a wide pot with water and bring to a boil. Prepare your toppings by putting the seeds/seasoning in bowls.
- To boil the bagels: Place as many bagels as fit comfortably in one layer in your pot, and boil them for 20-30 seconds on one side then flip them over gently to boil them for 20-30 seconds on the other side. Take out of the water with a slotted spoon onto a cooling rack to drain, then boil the remaining bagels.
- Once the bagel is boiled, you can toss it in its topping. It's better to do this when the bagel is freshly boiled, as the seeds will adhere better.
- Place the bagels in the oven and turn the temperature down to 230℃/460℉ and bake for 20 minutes, rotating halfway through and checking in the final minutes to make sure they're not taking on too much colour. You want them to be lightly golden brown, with a dark golden bottom. The ideal internal temp is 205℉.
- Enjoy warm with cold cream cheese, or allow to cool and toast them.
Notes


Leave a Reply