These cinnamon rolls are inspired by the kind you’d expect from a great bakery: soft, rich, and deeply comforting, but thoughtfully made. The dough method is inspired by Claire Saffitz and her approach to enriched yeasted doughs, including scalding the milk, and using the tangzhong method. Together, these techniques create a dough that holds onto moisture and bakes up exceptionally soft and fluffy.
The tangzhong – a cooked paste made from a portion of the flour and liquid – plays a key role in hydrating the dough, especially when working with fresh-milled or whole wheat flour. It helps the scrolls stay tender rather than dense. If using whole wheat flour, sifting out the bran helps preserve that pillowy texture while still adding depth of flavour. An egg adds lift and structure, while butter tenderises the dough for a rich, soft crumb.
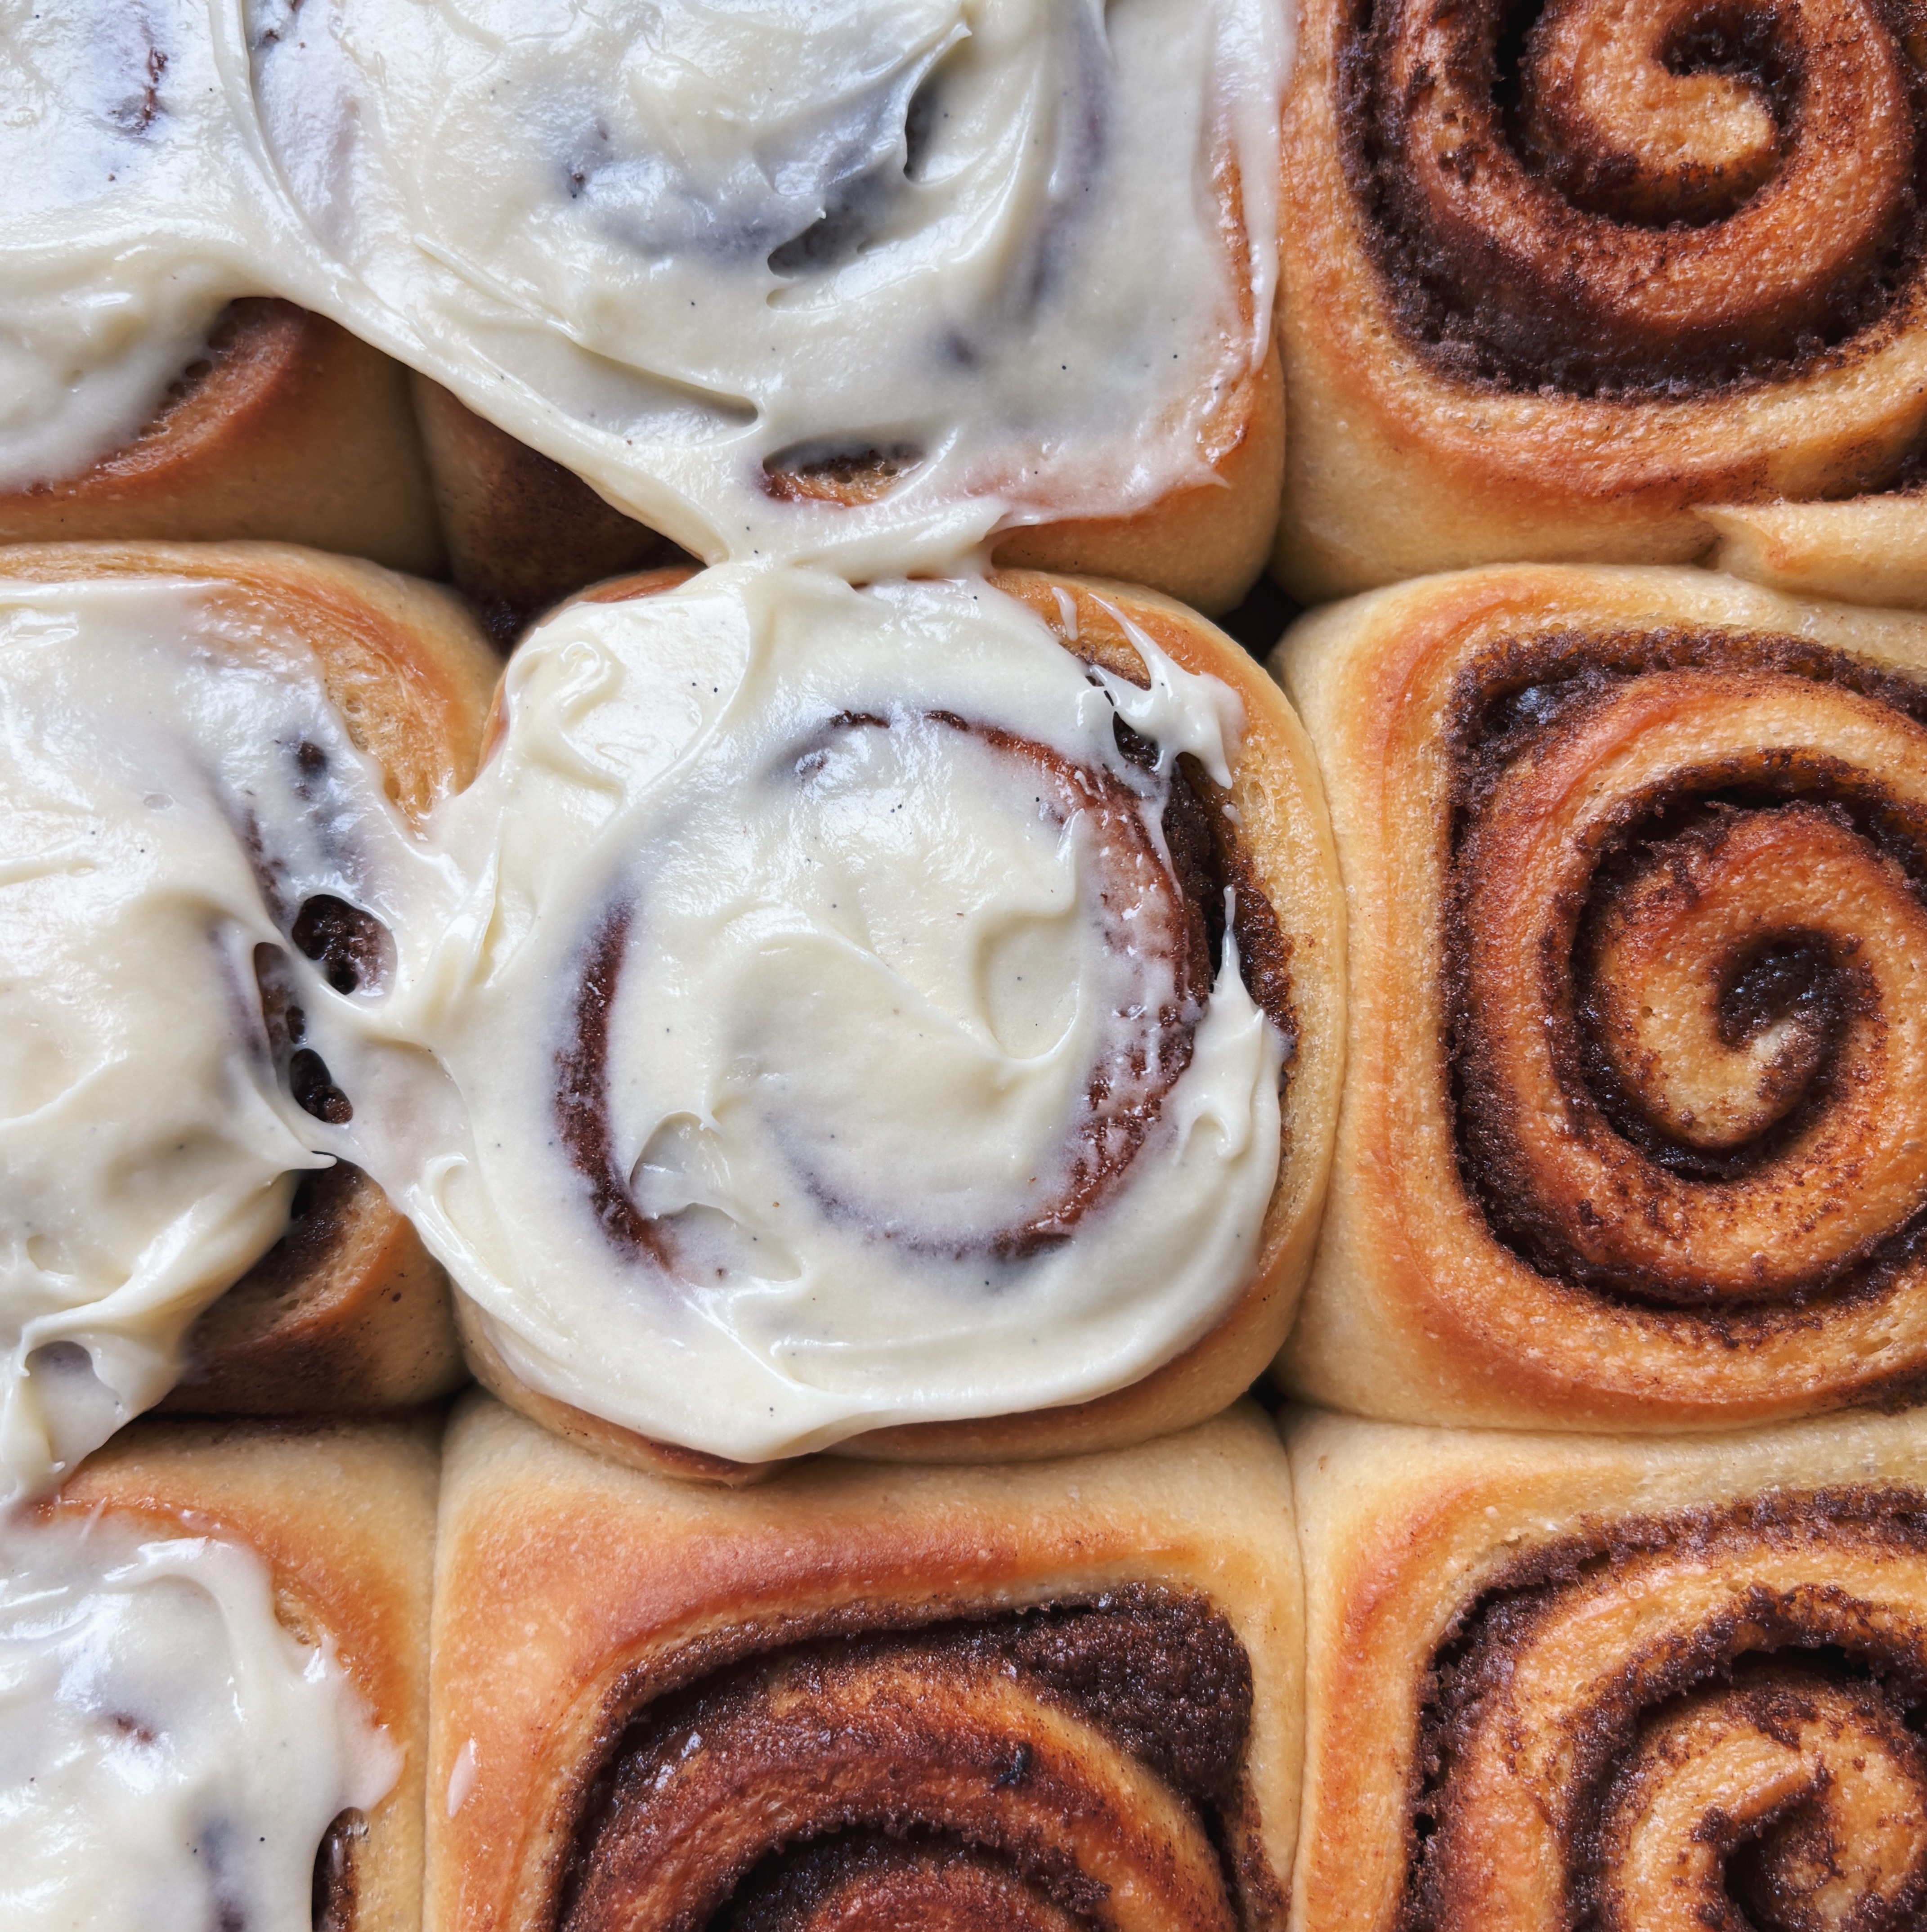
The cinnamon filling is a little different too: inspired by Hani’s Bakery in NYC, it includes flour and egg, creating a custard-like paste that stays inside the scrolls instead of melting out. The result is a perfectly layered swirl with cinnamon flavor in every bite.
Everything is finished with a generous layer of sweet, rich cream cheese icing, lightly flavoured with maple and vanilla for depth without overpowering the cinnamon. While the method is inspired by Claire Saffitz, the recipe has been adapted and developed to make these cinnamon scrolls my own. Best made over two days, they’re ideal for planning ahead for breakfast or brunch: freshly baked, warmly iced, and every bit as indulgent as an elevated Cinnabon. Makes 9 scrolls.

Mixing the dough
Mixing the dough is a slow, intentional process, and each step builds toward that soft, bakery-style crumb. It begins by scalding the milk, which helps deactivate proteins that can inhibit yeast activity, creating a stronger, more reliable rise. Half of the hot milk is then used to make a tangzhong, a quick-cooked paste of milk and flour that dramatically improves moisture retention, especially when working with whole wheat or fresh-milled flour. Once slightly cooled, the tangzhong is combined with the remaining milk, water, and egg and gently mixed to temper the ingredients before the yeast and flours are added. After a short autolyse, which allows the flour to fully hydrate, the sugar and salt are mixed in, followed by a long, gentle knead. Butter is incorporated slowly, piece by piece, until the dough becomes exceptionally soft, smooth, and elastic, easily stretching into a strong windowpane. After rising just halfway, the dough is chilled overnight, allowing flavour to develop and making the rolls easier to shape the next day while preserving their light, pillowy texture.


A Cinnamon Filling That Stays Put
There are a few popular approaches to cinnamon roll filling, each creating a slightly different texture and flavour.
One classic option is a variation of remonce: a creamy paste made from butter, brown sugar, and cinnamon. This style melts into the dough as it bakes, creating rich, gooey layers.
Another approach is adding crushed biscuits or cookies to the filling. This bulks out the butter and sugar, adding structure and extra flavour – Biscoff cookies work especially well here.
A third method uses egg and flour in the filling. This creates a custard-like paste similar in structure to a biscuit-based filling, but without changing the flavor profile. The result is a filling that stays neatly inside the rolls while keeping the taste classically cinnamon-forward.
The type of sugar you use also makes a big difference. Demerara, light brown, dark brown, and muscovado all bring something different. I love muscovado for its deep, molasses-like intensity, often paired with dark brown sugar for balance.
You can also add nuts, like pecans or walnuts, for extra texture and flavour. Candied pecans make an especially pretty topping on iced cinnamon rolls.
For this recipe, I use egg and flour in the filling for one key reason: it keeps the cinnamon swirl where it belongs, instead of melting out during baking. I stick with muscovado and dark brown sugar, and a small pinch of salt to sharpen and highlight the warmth of the cinnamon, resulting in perfectly layered rolls with cinnamon in every bite.


Proofing the Cinnamon Rolls
Proper proofing is key to light, fluffy cinnamon rolls. After shaping, the rolls need time to rise until they’re soft, puffy, and just touching each other. Under-proofed rolls will bake up dense, while over-proofed ones can collapse or lose structure in the oven.
For the final proof, look for rolls that have noticeably increased in size and feel airy when gently pressed. A light fingertip press should leave an indentation that slowly springs back – if it springs back immediately, they need more time.
Temperature plays a big role here. In a warm kitchen, proofing may take 60–90 minutes; in a cooler space, it can take much longer. If needed, you can create a warm proofing environment by placing the rolls in a turned-off oven with the light on, or near (not on) a warm spot in your kitchen.
It’s also important to keep the rolls covered while they proof to prevent the surface from drying out and forming a skin. Tightly covering the pan with plastic wrap works best, but a sheet of foil or a lightly dampened tea towel will also do the job, as long as it isn’t weighing down the rolls.

Baking the Cinnamon Rolls
Bake the cinnamon rolls in a preheated oven at 180°C / 350°F. If you’re using a fan-forced (convection) oven, reduce the temperature by 10–15°C to prevent over-browning. Cinnamon rolls should bake up soft and pale rather than deeply golden—too much color is a sign they’re drying out.
To encourage good oven spring and keep the rolls tender, avoid baking them uncovered for too long if they’re browning quickly. Lightly tenting the pan with foil partway through baking can help protect the tops while the centers finish cooking.
If you have an instant-read thermometer, it’s the most reliable way to check doneness. Insert it into the center of a roll; you’re looking for an internal temperature of 190–200°F (88–93°C). At this point, the rolls will be fully baked but still soft and fluffy inside.

Rich Cream Cheese Icing, Inspired by Cinnabon
This cream cheese icing is inspired by the classic Cinnabon finish: sweet, rich, and generously spread. Cream cheese gives the icing body and a subtle tang to balance the sweetness, while butter adds richness and smoothness. A touch of maple syrup deepens the flavour without overpowering the cinnamon, and vanilla rounds everything out. The result is a thick, glossy icing that feels indulgent and familiar, perfectly complementing the soft, pillowy rolls underneath.
The key to a smooth, lump-free cream cheese icing is temperature. If the cream cheese or butter is even slightly cold, the icing can become frustratingly lumpy. At room temperature – or gently softened in the microwave if your kitchen is cool – they blend together easily with a flexible spatula into a silky, spreadable icing.
Cinnamon rolls are truly best served fresh, and it’s tempting to ice them straight out of the oven – and you absolutely can. The icing will melt into the crevices of the rolls which is delicious in its own way. For a more classic look, wait about an hour before icing so it stays thick and swirled on top, while the rolls are still warm in the centre.


Soft and Delicious Cinnamon Rolls with Cream Cheese Icing
Ingredients
Equipment
Method
- The first step is to scald the milk – this breaks down proteins that inhibit yeast production, so don't skip this step! Bring the milk to a steaming low simmer on the stove top, then turn off the heat and pour about half the milk into your mixing bowl to cool.
- To the milk remaining in the pan, add a third of your whole wheat flour, whisking to combine. Turn the heat back on to medium-low, and whisk constantly until a hot paste forms – this should about 1 minute.
- Add this to your mixing bowl, and allow to cool slightly (at least 10 minutes) while you measure out your remaining ingredients.
- Add your water, egg, then give everything a light mix to temper the ingredients. Add the yeast, and remaining flours and mix together with your hand until all the flour is mixed in. Allow this to sit (to hydrate the flour) for 10 minutes.
- Add the sugar and salt to this mixing bowl, then with the hook attachment, mix on low speed for 12 minutes.
- After 12 minutes, increase the speed to medium-low and start to add your butter slowly, allowing each piece to incorporate before adding the next. This should take about 5 minutes. Continue to mix for another 5-10 minutes until the dough is super soft and smooth, and you can stretch a good windowpane from a piece of dough.
- Grease a medium-sized bowl with butter (big enough to fit more than 2x the dough), and pop the dough in, covered with plastic wrap or a lid, to rise by 50%. This will take about an hour, or less if your dough is feeling quite warm.
- Once the dough has risen by 50%, cover and transfer to the fridge overnight, where it will continue rising.
- In a medium mixing bowl, use a spatula to mix all the filling ingredients together until completely smooth.
- Butter and line a 9"/23cm square tin.
- Pull the dough out of the fridge and flatten it onto a floured bench into a rectangular shape. Using flour to make sure the dough doesn't stick to the counter, roll the dough out to 14"/36cm wide and 12"/30cm high. The dough will shrink a little bit, but take your time to get to these measurements.
- Smear the filling across the dough, right to the edges.
- Starting from the bottom of the dough, roll the dough up into a neat log. Transfer to a lined tray, and put the log in the freezer for 20 minutes to firm up (this will make cutting them a bit neater and cleaner).
- Bring the log out of the freezer to a cutting board, and use a sharp chef's knife to cut off about ½"/1cm from the ends. Use the knife to cut 9 roughly equal pieces – I do this by diving the log into 3, then each third into 3 again.
- Place the pieces into the lined tin, and cover with plastic wrap. Allow to proof in a warm space until the buns are very puffy and touching.
- Preheat the oven to 180℃/350℉.
- Bake the scrolls for 15 minutes, then rotate and bake for another 10 mins. We do not want the rolls to brown too much as they'll dry out, and we're aiming for an internal temperature (of the middle bun) of 190°-200℉.
- Allow to cool for at least an hour before icing.
- With a spatula, mix the room temperature cream cheese with the icing sugar, then add the butter, salt, vanilla and maple syrup. Continue mixing until the icing is completely smooth.
- Spread the icing over the cooled rolls, and enjoy right away!


Leave a Reply